Being Gluten Free and Dairy Free can be a saga. You go through endless searches, trial and error. You have tasted more than your fair share of cardboard.
For years I pretended bread just didn’t exist. Eventually I grew brave. I would learn how to bake my own gluten free dairy free loaf.
Gluten Free bread is finicky. Eggs can be replaced, but getting a loaf that stays fresh, and soft is difficult to accomplish, in absence of preservatives.
My first attempt at a gluten free dairy free bread was a buckwheat, almond, corn loaf. It was quite hardy, and crumbly. It was not an epic fail by any means. I used a pyrex bread pan. I knew I had much to learn.

After a bit of research, I purchased a cast iron enamel dutch oven. I also bought a bread machine, and started educating myself on the different flours you use, along with the binders.
I have tried making both a wheat sourdough starter (for other people), and a gluten free starter. My wheat and gluten free starters were bubbly. A sourdough starter is the old school method of helping bread rise, by fermentation, where “wild yeasts,” are captured in the air, via two ingredients, water (chlorine free), and flour (gluten free).
But I always ruined them. I would leave the starter in the oven, to stay warm, and forget it was there a moment. I would remember when I was preheating the oven for dinner.
At least I know how to make a starter. I had dreams of tasty sourdough pizzas, and pancakes, which are not bread. Both of those I had made successfully before.
Tip: Use only non chlorinated water for starter. To remove chlorine from water, simply boil for 20 minutes, and cool.
My Zojirushi bread machine had arrived, and it was time to test it out, with it’s gluten free setting I heard so much about.

It has many different settings in addition to gluten free, to experiment with, but for now I would stick with the gluten free setting.

Time and Temperature
Making a loaf of bread, involves a chemical reaction. The ingredients interact, and change form. A little too much of this, or a little too much of that, and the bread will not work out.
Many recipes I had read advocated to add a little acidity, to help create the bubbles in the bread. I always thought letting bread sit overnight, allowed it to get those bubbles.
There is so much to know, especially what would inhibit the yeast. Salt, oil, and vinegar can stop it from bubbling. After playing around with some recipes, this one seemed to work out for me. I hope you enjoy!
Gluten Free Dairy Free Bread
Dry Ingredients
2.5 Cups of Gluten Free Flour Blend (Rice, tapioca, Potato, etc)
1/2 Cup of Almond Flour or meal
1/3 Cup Ground Flaxseed
1 tsp xantham gum
1 tsp baking powder
1tsp salt
Wet ingredients
3 tsp Egg Replacer with 6 tbsp water made to a slurry
1 cup warm, not hot water (with 1 packet of yeast and 1 tbsp sugar dissolved in it)
1/3 cup coconut oil
1 tsp lemon juice or 1/2 tsp of acv (whatever you have)
So what I did, was combine all the ingredients, as you normally would. First I let the yeast, sugar, and warm water, get all bubbly for 30 min. Then I mixed, and sifted my flour, flaxseed, xanthum gum, and baking soda in a bowl. I added the water, and egg replacer mix, kneaded, and covered this to sit overnight at room temperature.
The next morning, I added in the oil, salt, and lemon juice, before kneading again, for second rise. In the afternoon, it looked risen a bit, and I put the dough in the zohirushi on the gf setting, to forget about it, until it started ringing it was done about 2 hours later.

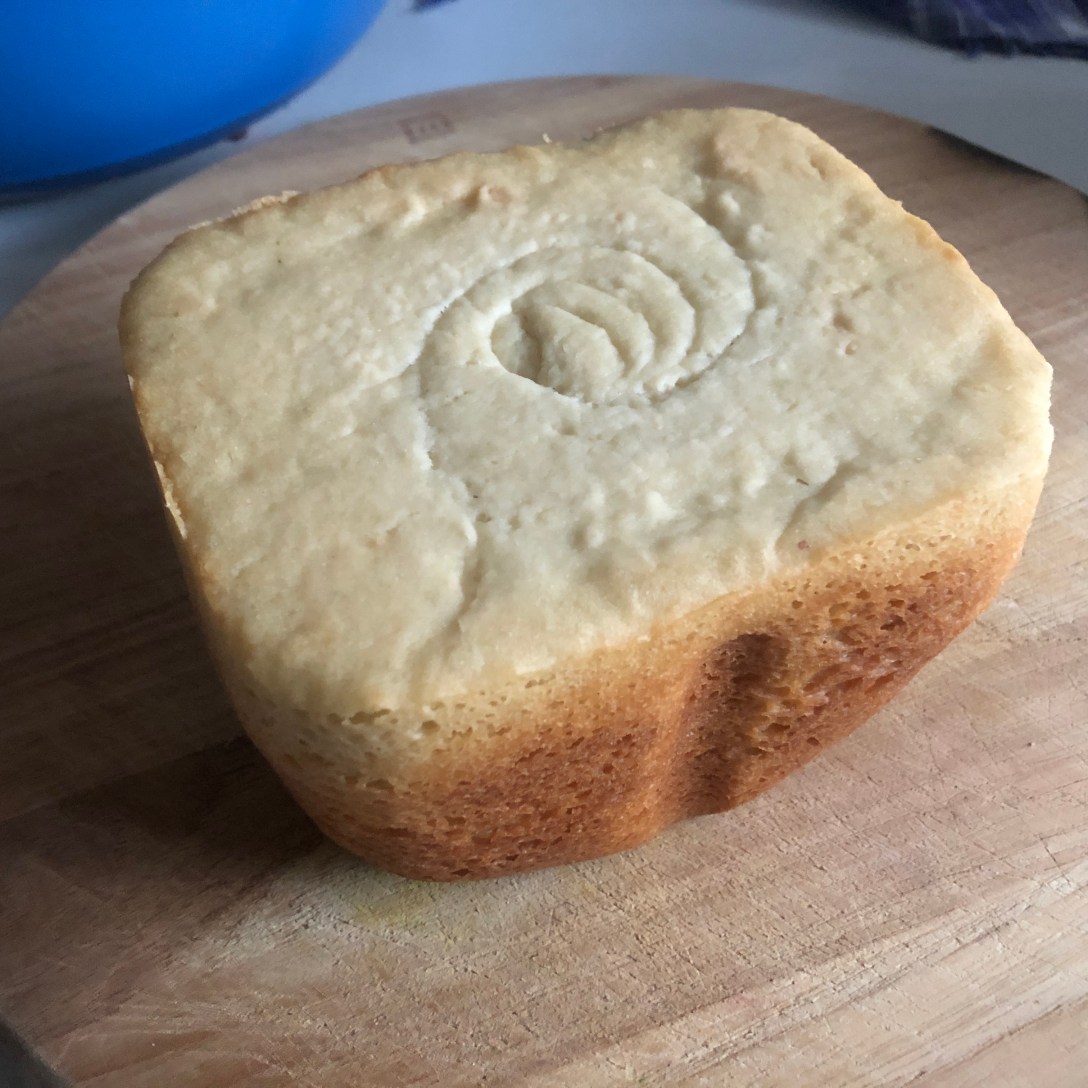
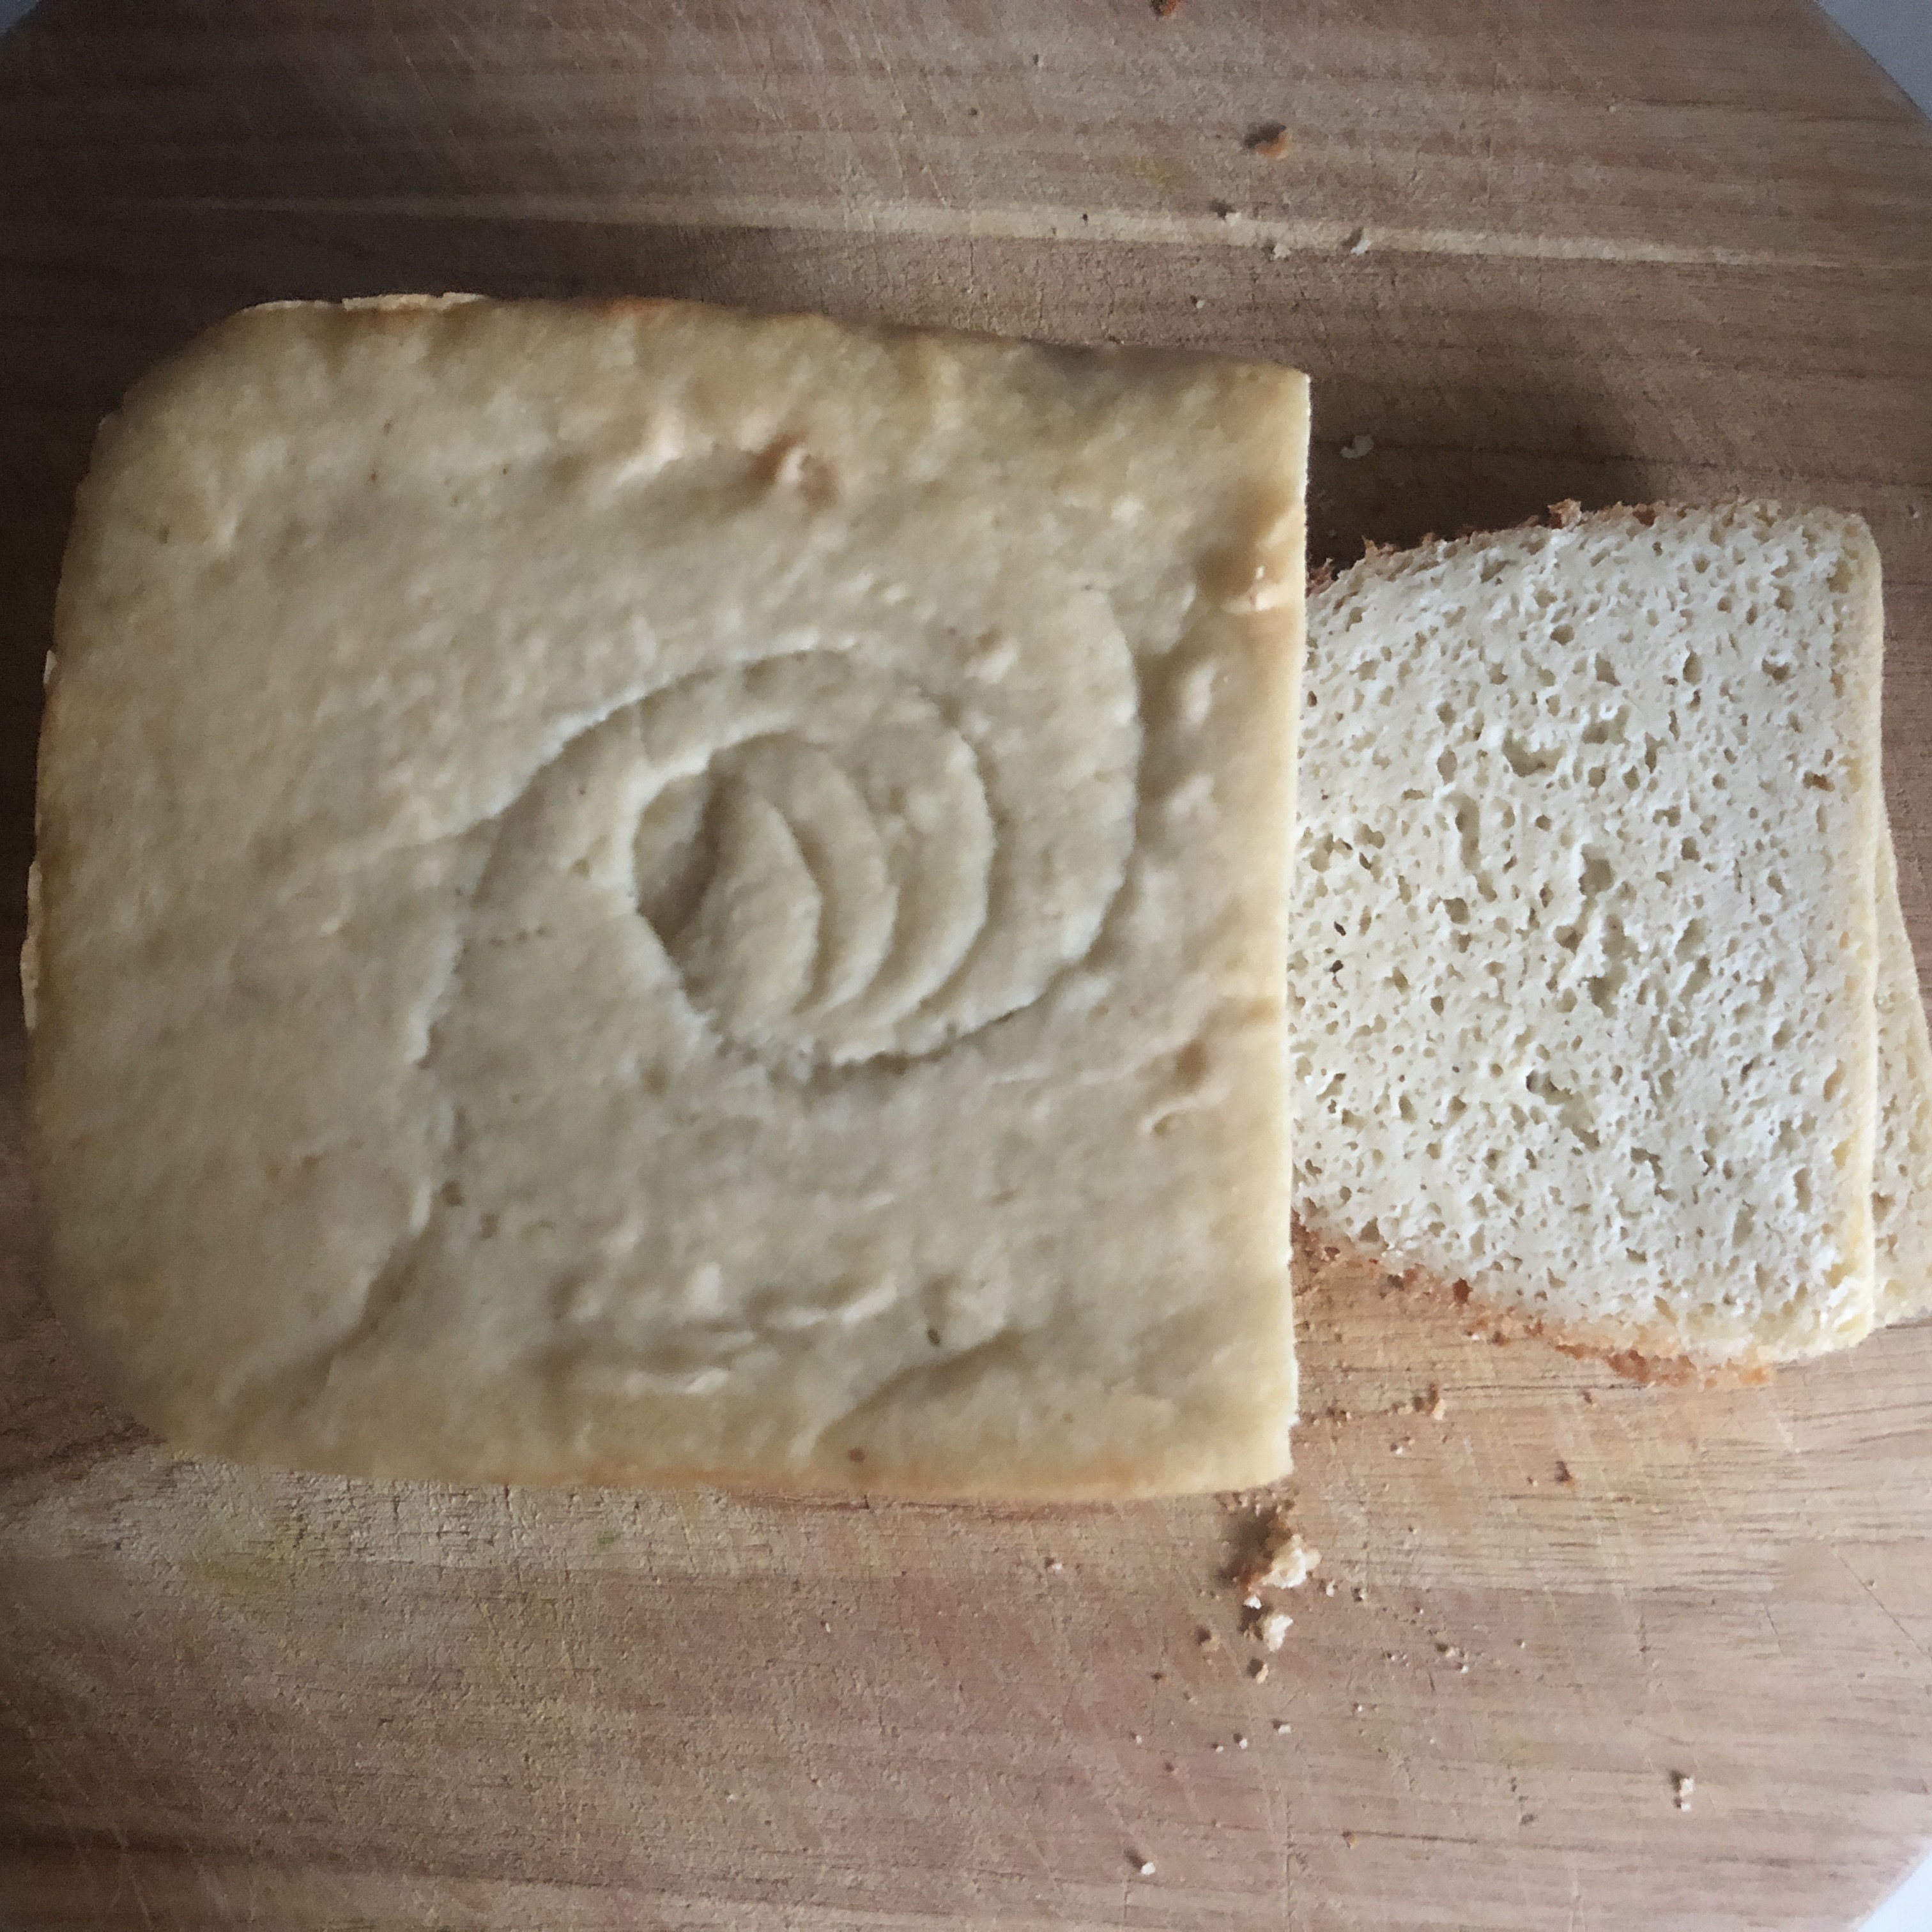
Here is the finished product…notice the funky shape of the top? This is what bread machines can do, to a gluten free bread. What I was more concerned with was the taste, and the texture…
I actually did not think it came out bad at all, it tasted really delicious!
After waiting about an hour, I sliced it up with a bread knife. It had a slightly spongy texture, and was not too dry.

Now the real test of a gluten free bread, is storage. If you put it in the fridge it gets very hard, like a rock, needing toasting to bring back to life. Due to the moistness, if you leave it on the counter, and don’t devour quickly enough, it can get moldy.
So I was generally happy with my bread, and used it up within 5 days.
I enjoyed this bread with soups, and for breakfast spread with marmalade. I used some as a sandwich too.
Feel free to try this, and comment below, on your gluten free baking success.
A Week Later
The second time around, I tried my recipe again, this time without flaxseed added, and with more almond flour. Here is my delicious result! The trick is to just keep playing around with your bread recipes, and be brave.
Eventually you will get it wired. Maybe you will even get in the tube. I love how my bread came out with this wave pattern.


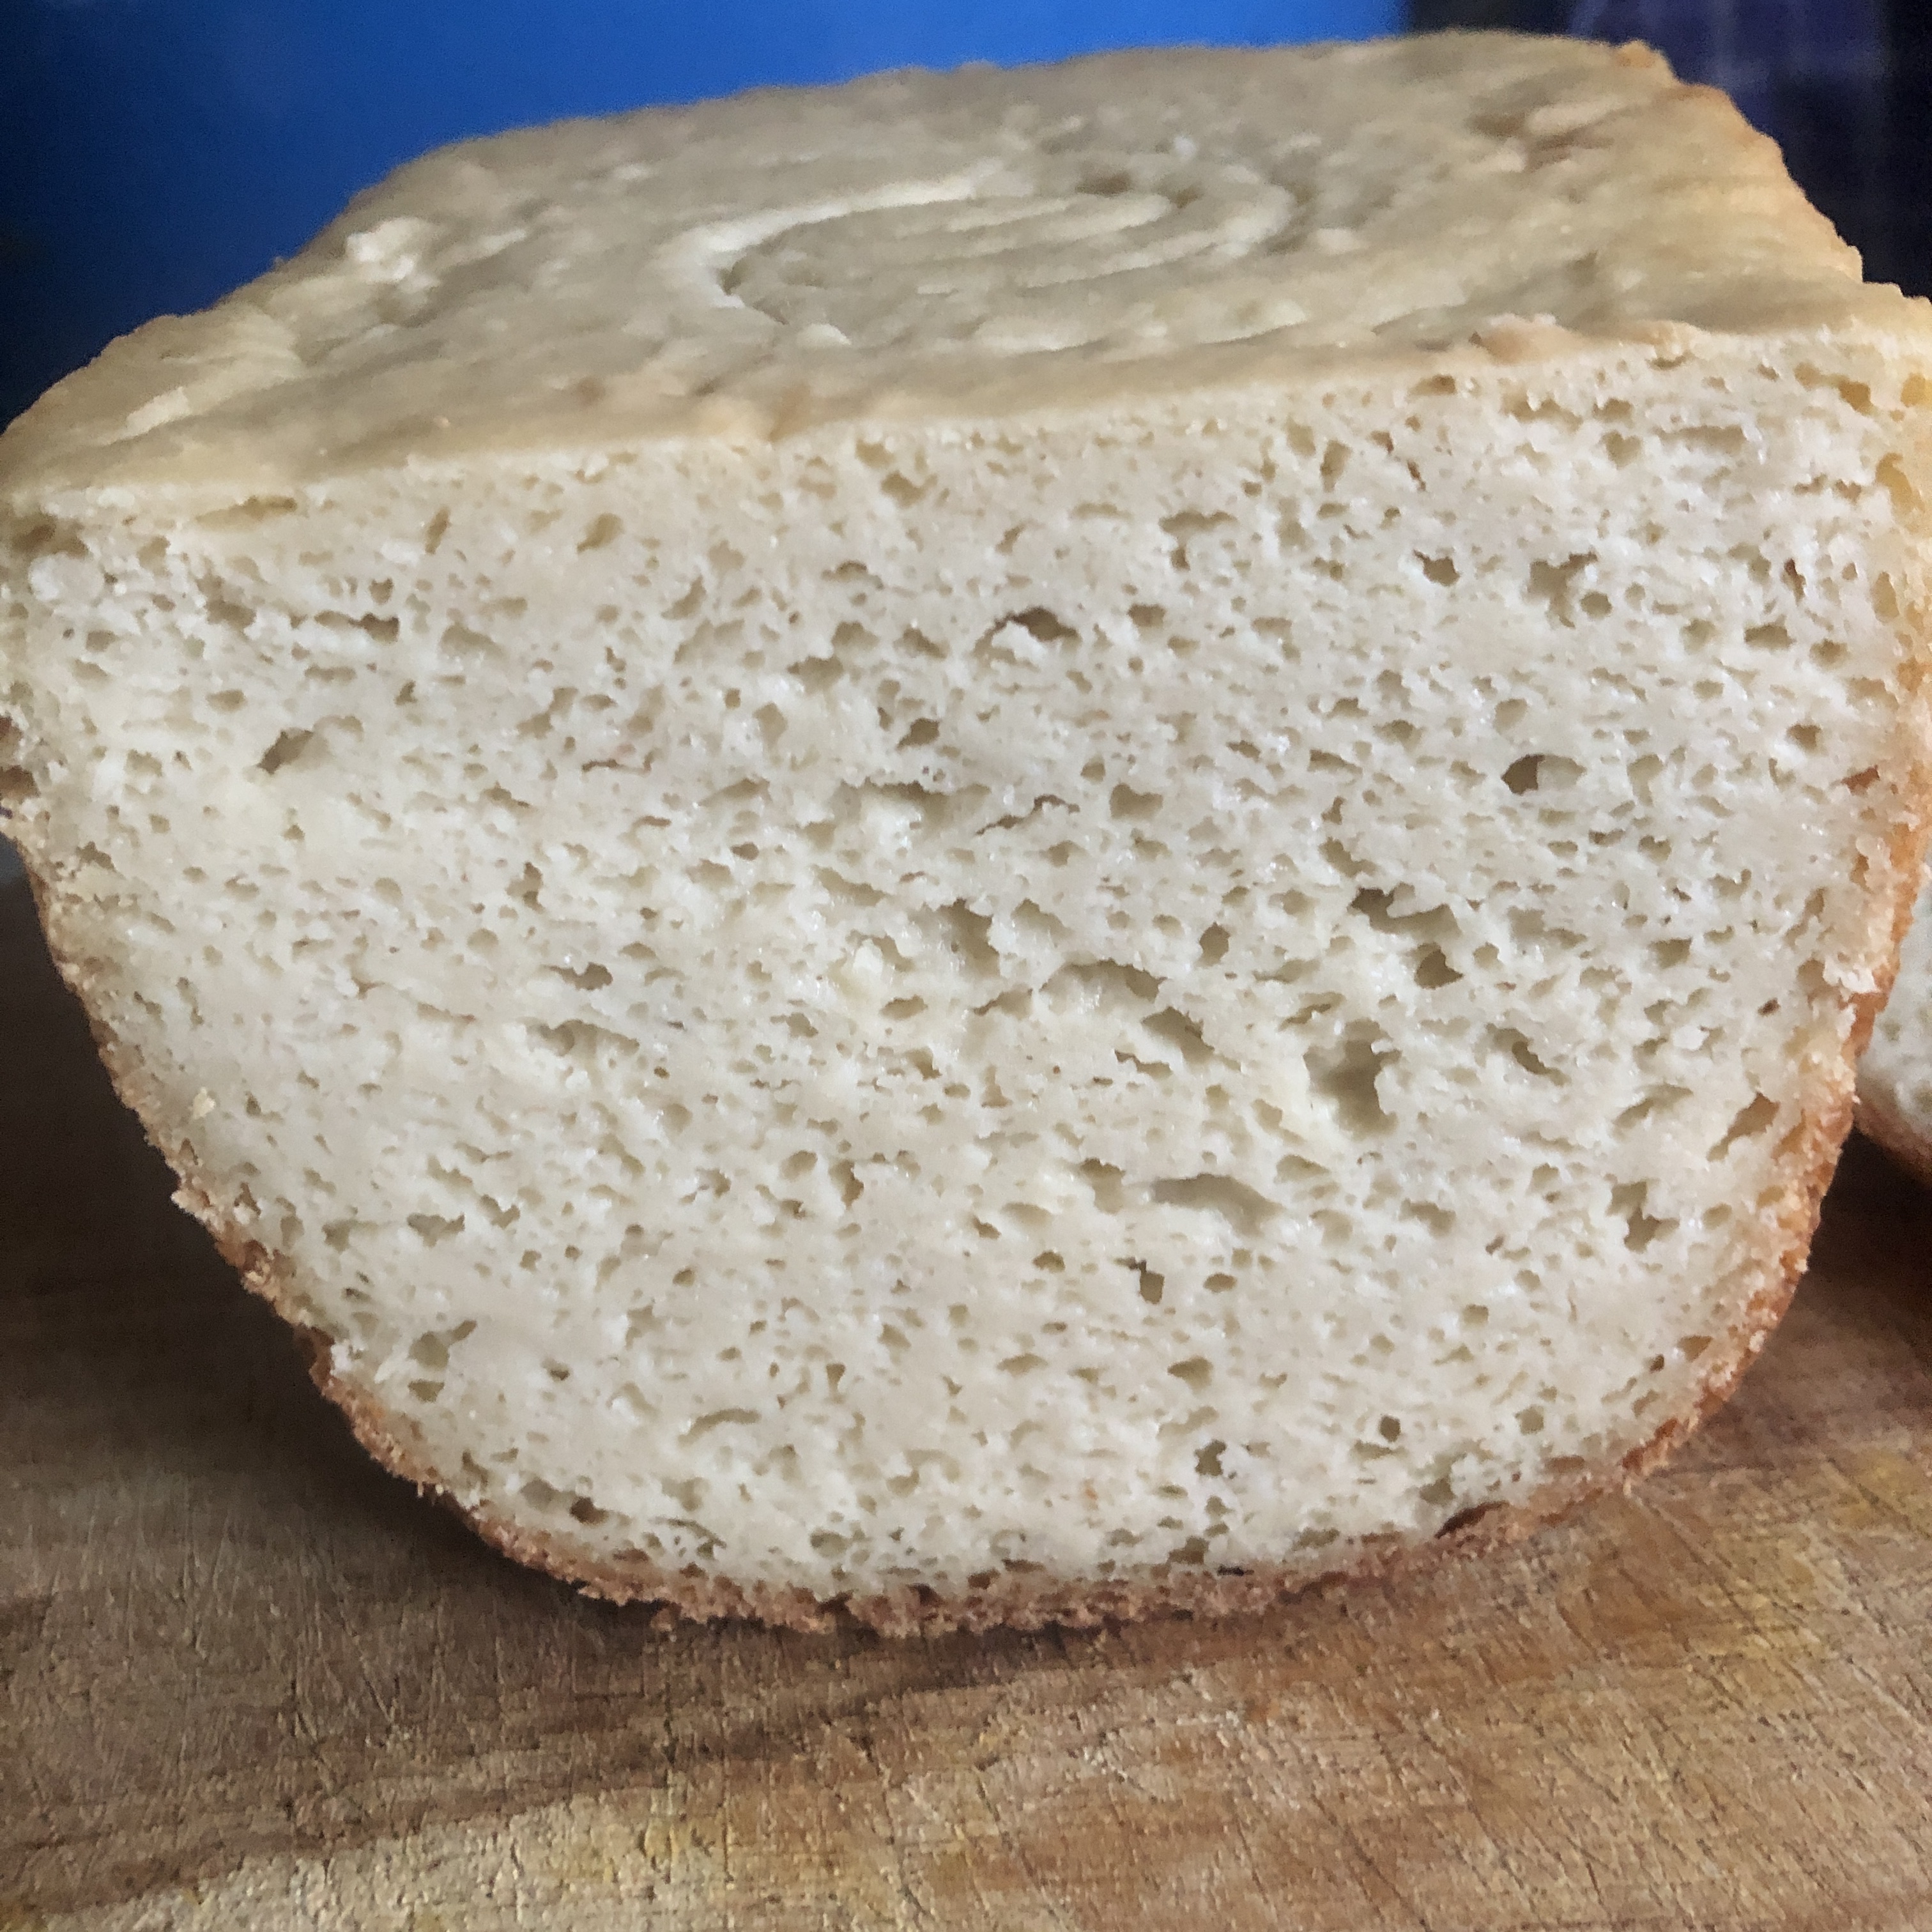
The second time, I did not allow it to rise, I just put it all right into the bread machine. I also subbed olive oil for coconut oil too. The machine did all the work, and left me with beautiful loaf with a lovely wave swirl on top, perfect for a surfer girl.
This loaf was also moister than the first one I made. I also let it sit covered in a linen towel on a cutting board upside down overnight, to cool.
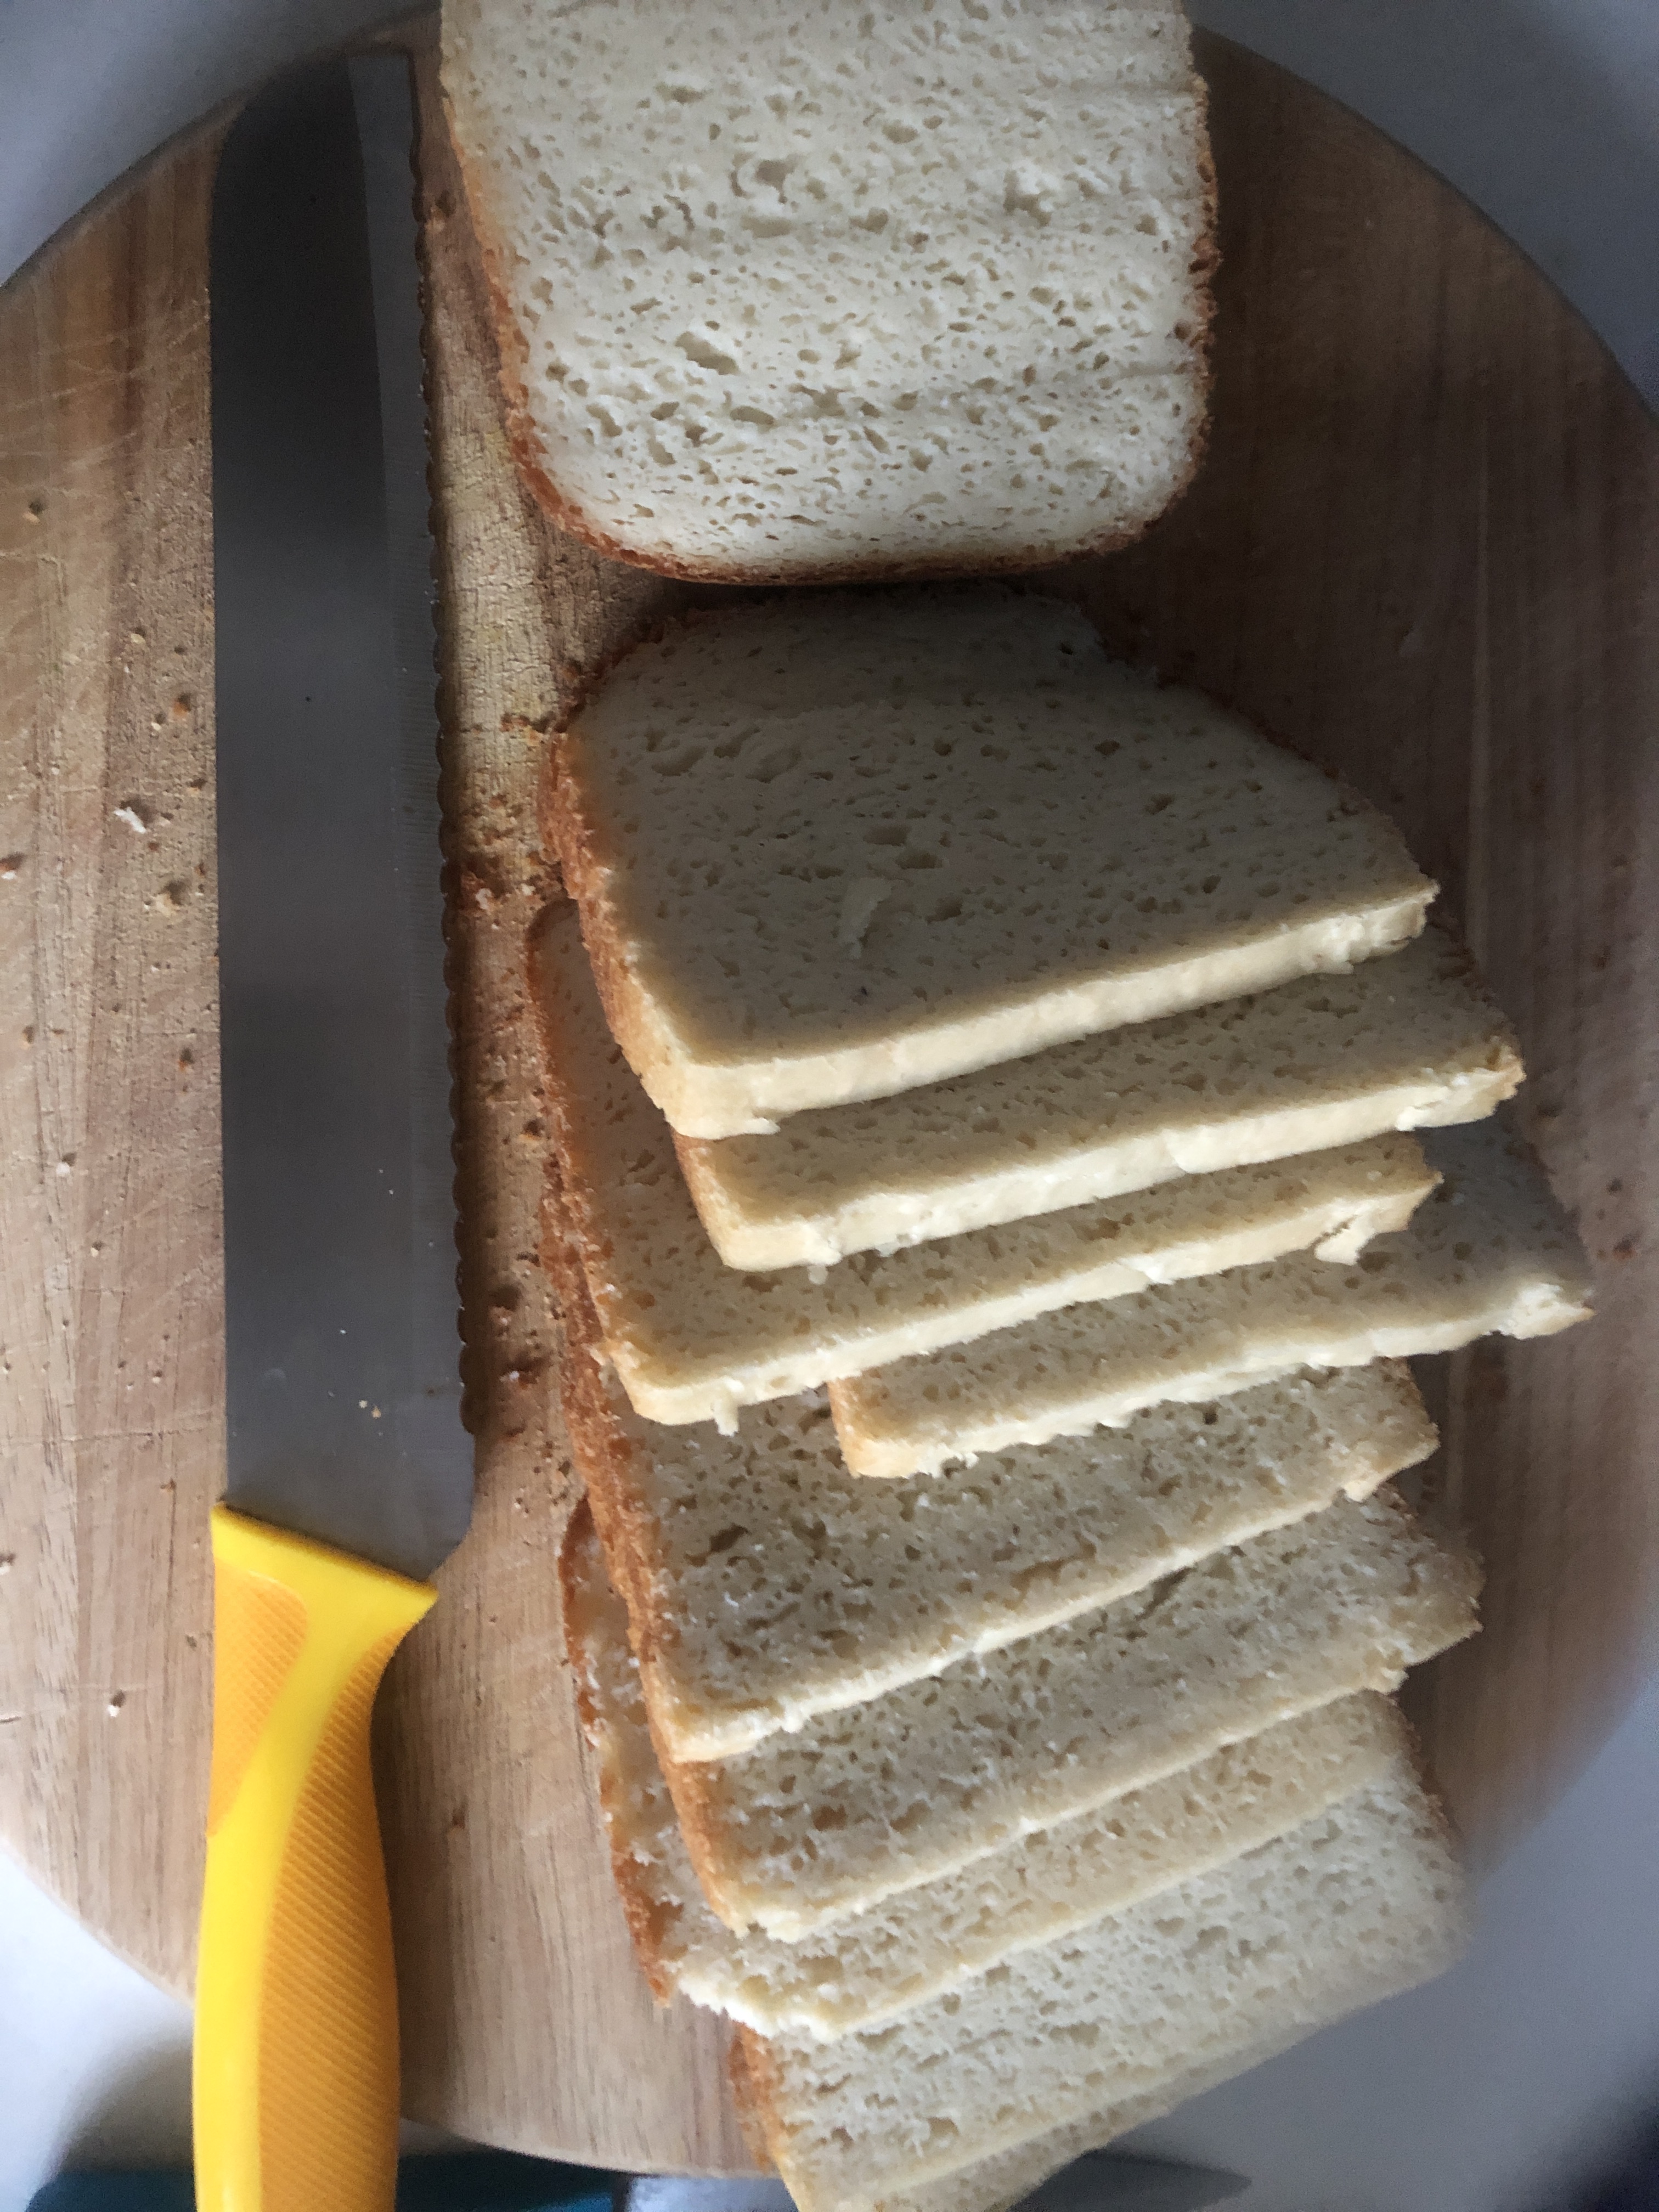
I sliced it thinner this time, yielding about 14 slices.
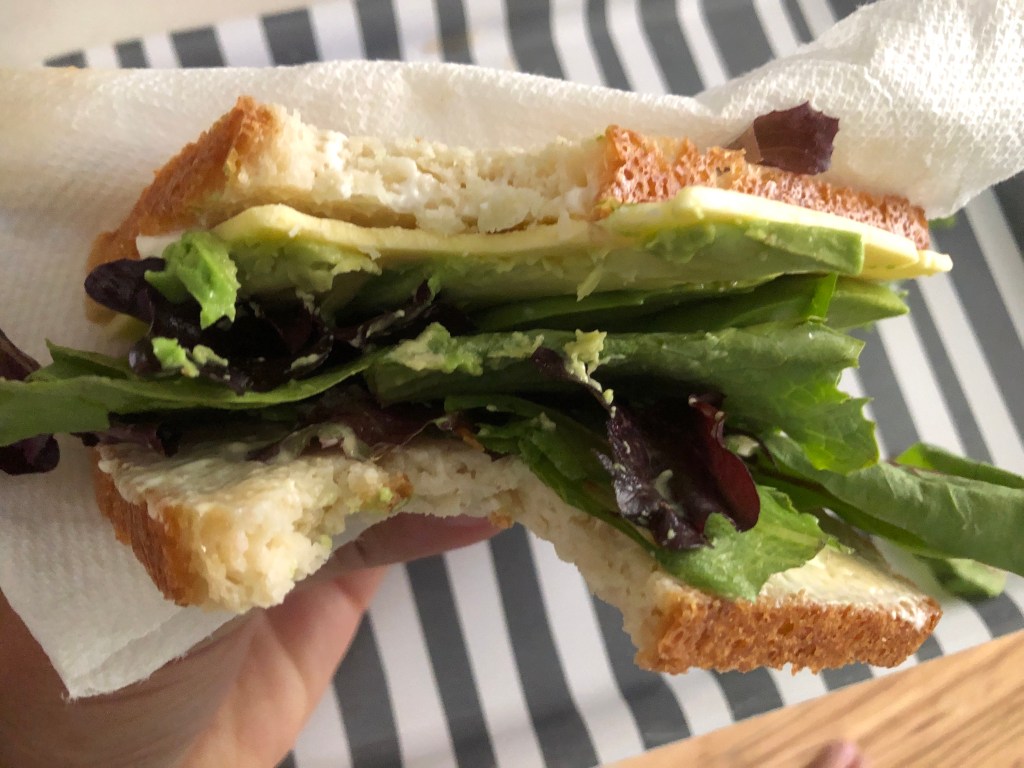
Dairy free Cheese Sandwich with Follow Your Heart Provolone and Avocado!
About me
I’m Serafina! I’m a writer and California girl who loves to go exploring. Hope you will get outside today, breathe some fresh air, and be happy!
Follow my Journey…
Be sure to Like and Subscribe to My Youtube Channel where I post videos!
Disclaimer: The work on this blog is my opinion and my opinion alone and I am not responsible for the outcome if someone were to apply these thoughts to their own life. All text and photography copyright 2020 by Serafina, all rights reserved. Information and opinions provided are kept current to the best of the author’s ability. All readers’ usage of the ideas and opinions presented in the blog, are at their own risk. Be aware of the possible dangers of hiking, surfing, walking, cooking, and other activities, which may take place indoors or outdoors. By reading this, you agree not to hold the author or publisher of the content on this web site responsible for any injuries or inconveniences that may result from reading the blog, or partaking in any activity mentioned in the blog. Read the blog, and use its ideas, if you so desire, at your own risk.
